How do I fill my timesheets?
Short Answer
Go to My Timesheets, select the period, enter your daily hours and any required project or notes, then save the timesheet.
Long Answer
The Timesheet feature allows contractors and employees to record and submit their work hours for a selected time period. Timesheets provide a consolidated view of your daily logs, tasks, and total hours worked, helping ensure accurate tracking and timely approval by your employer.
Step 1:
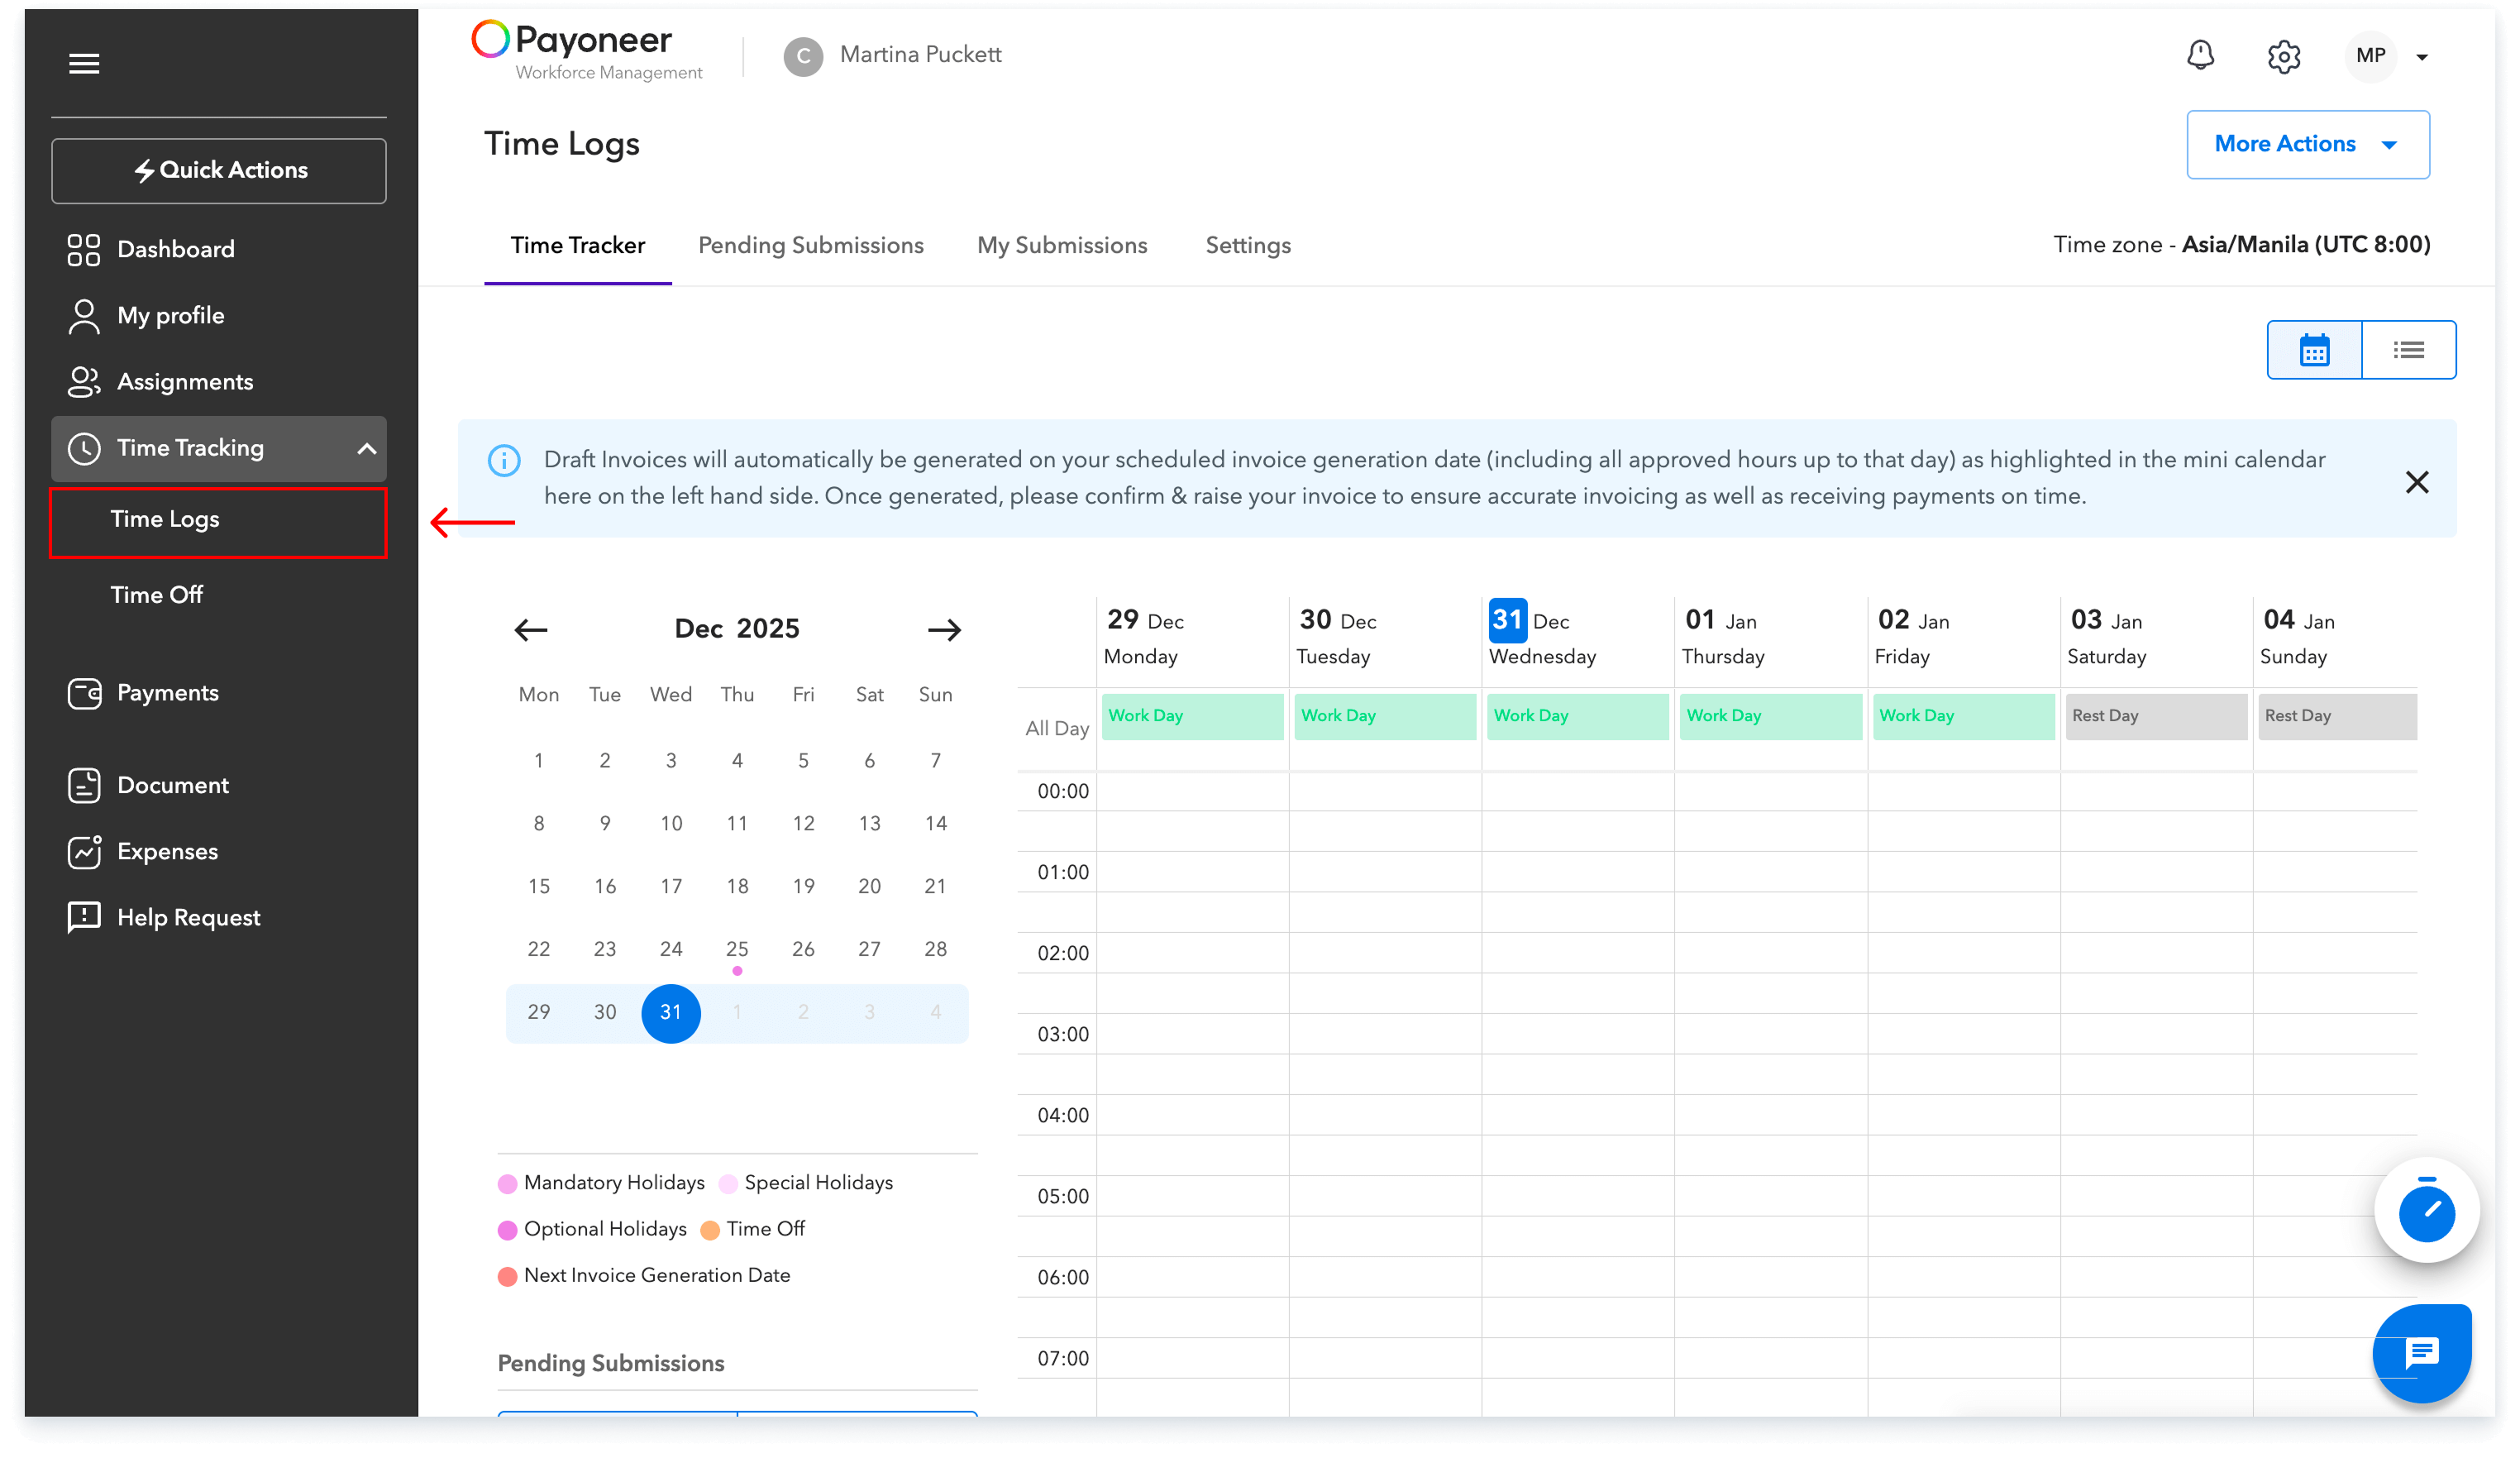
Log into the platform and navigate to the ‘Time Tracking’ tab on the side panel. Here, select the ‘Time Logs’ option.
Step 2:
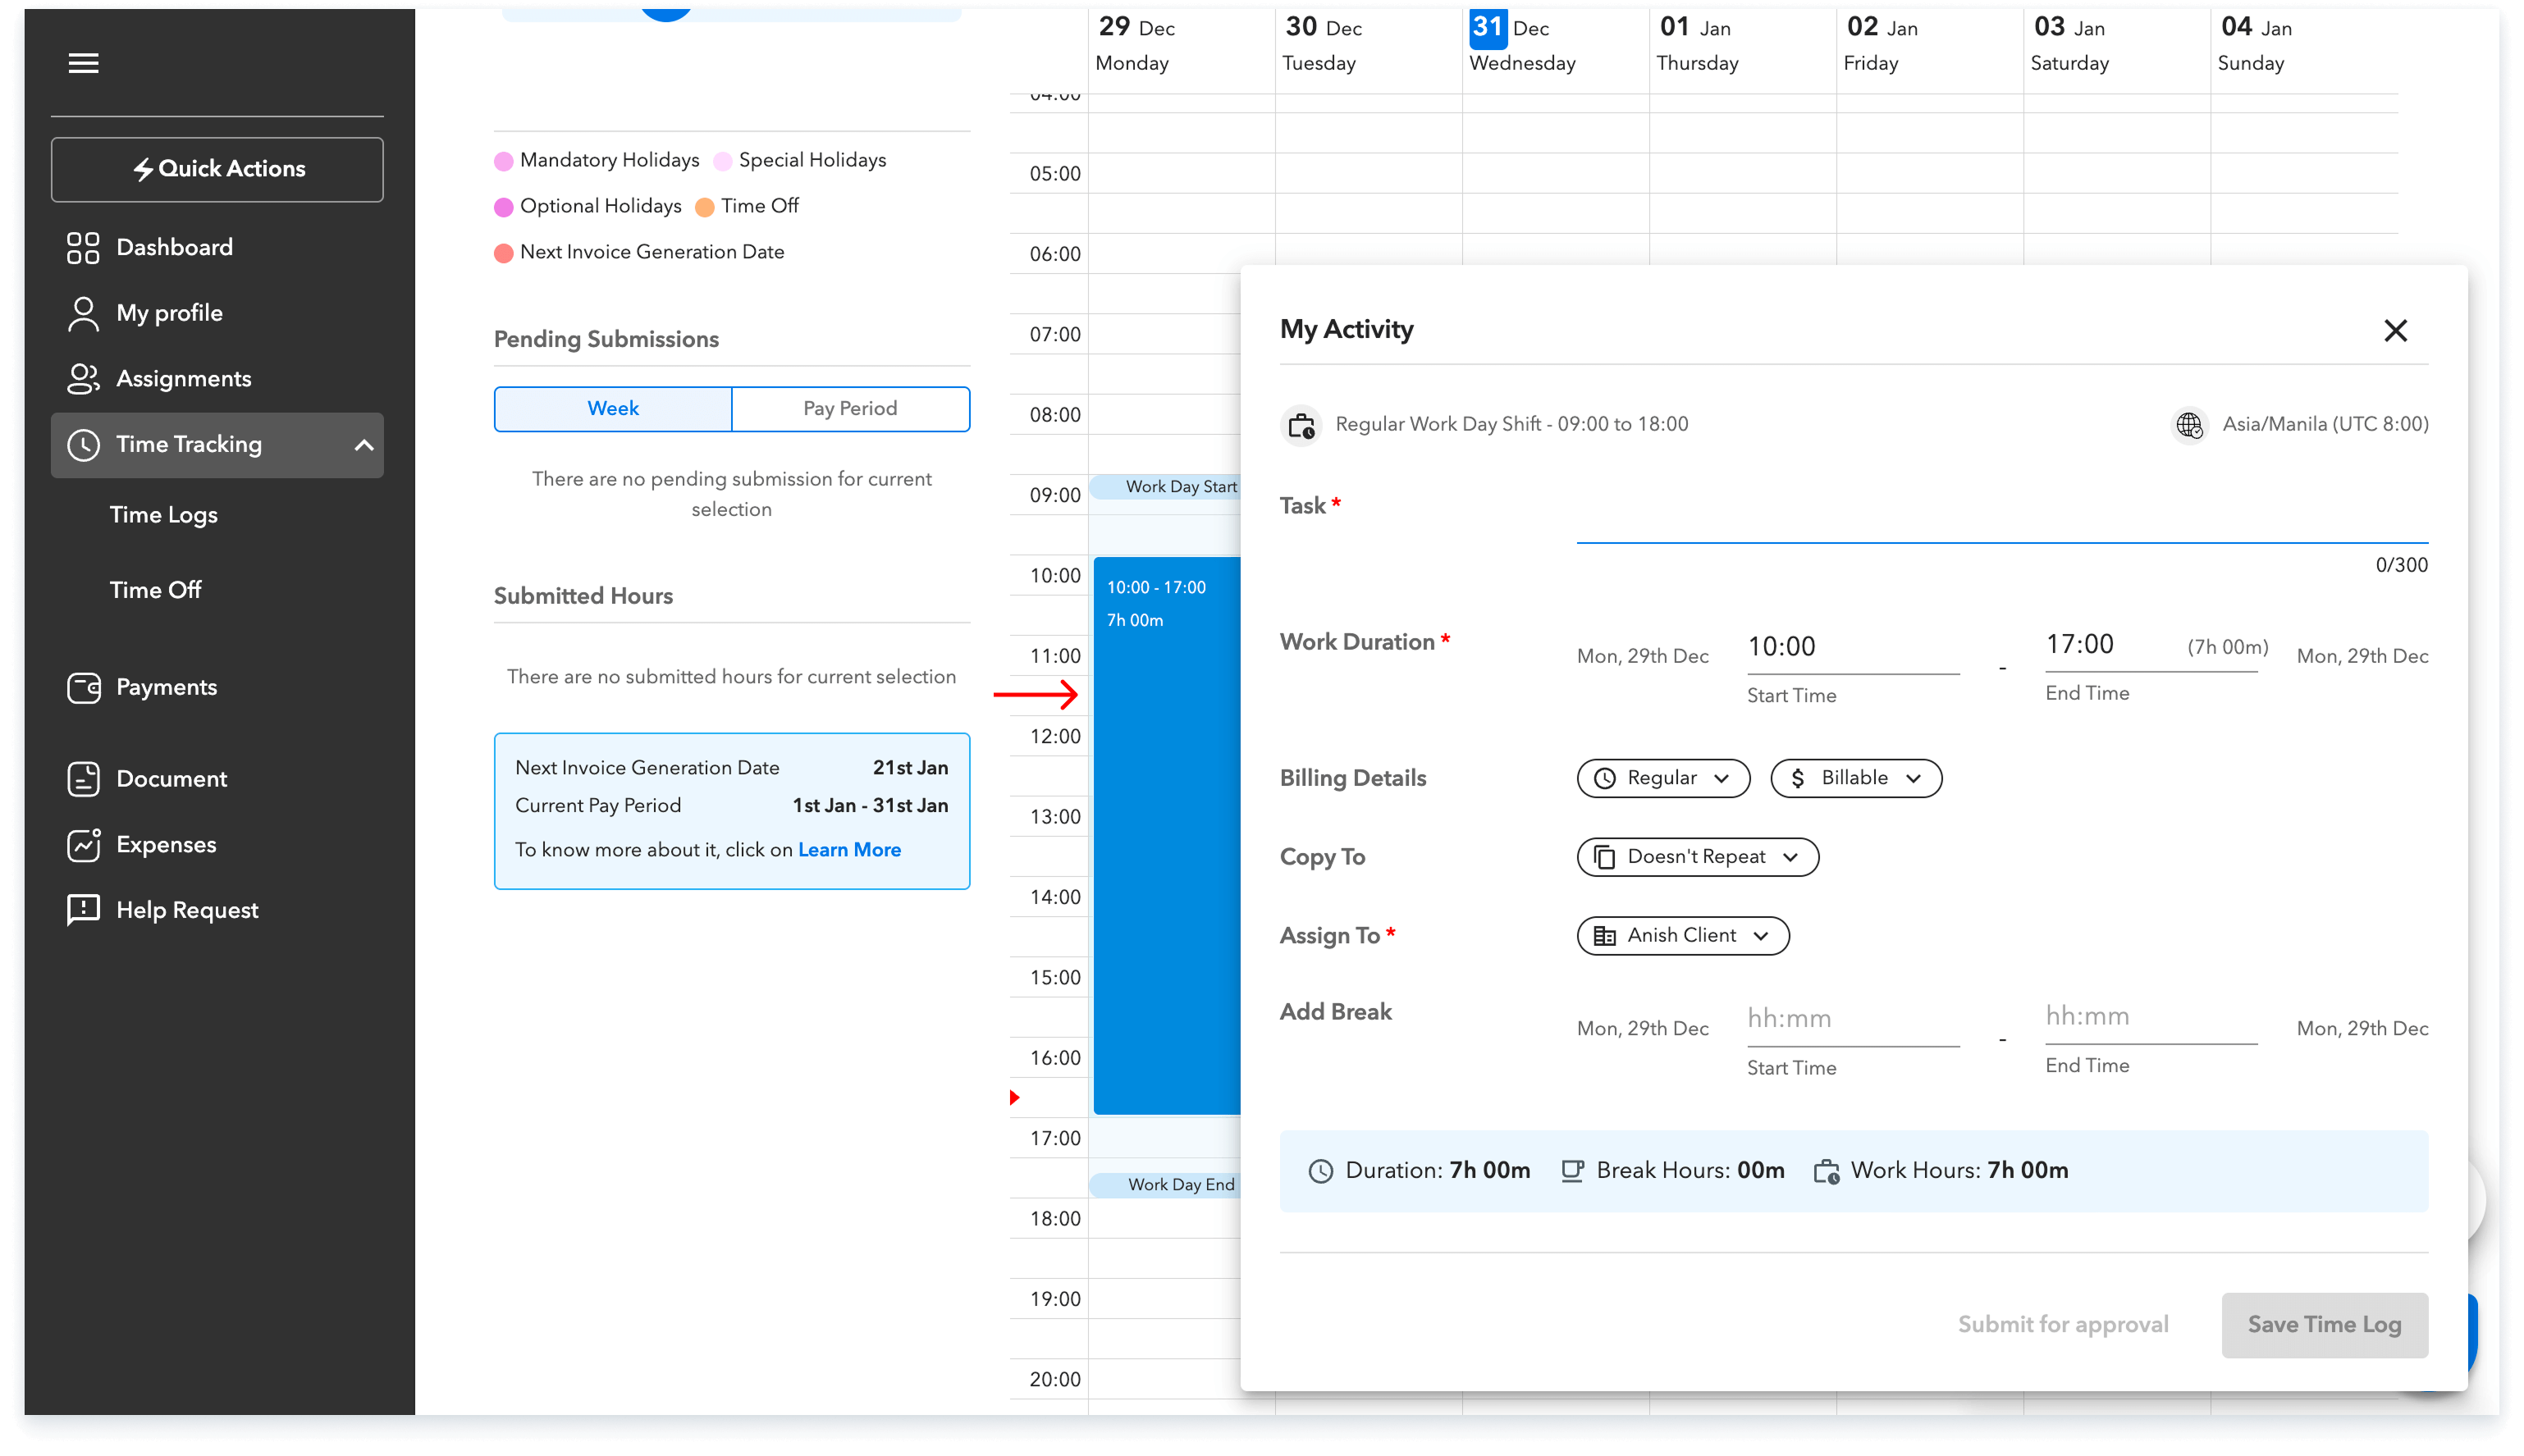
- Select the time period in the calendar for which you wish to fill in the time sheet.
- Fill in the details of the time period.
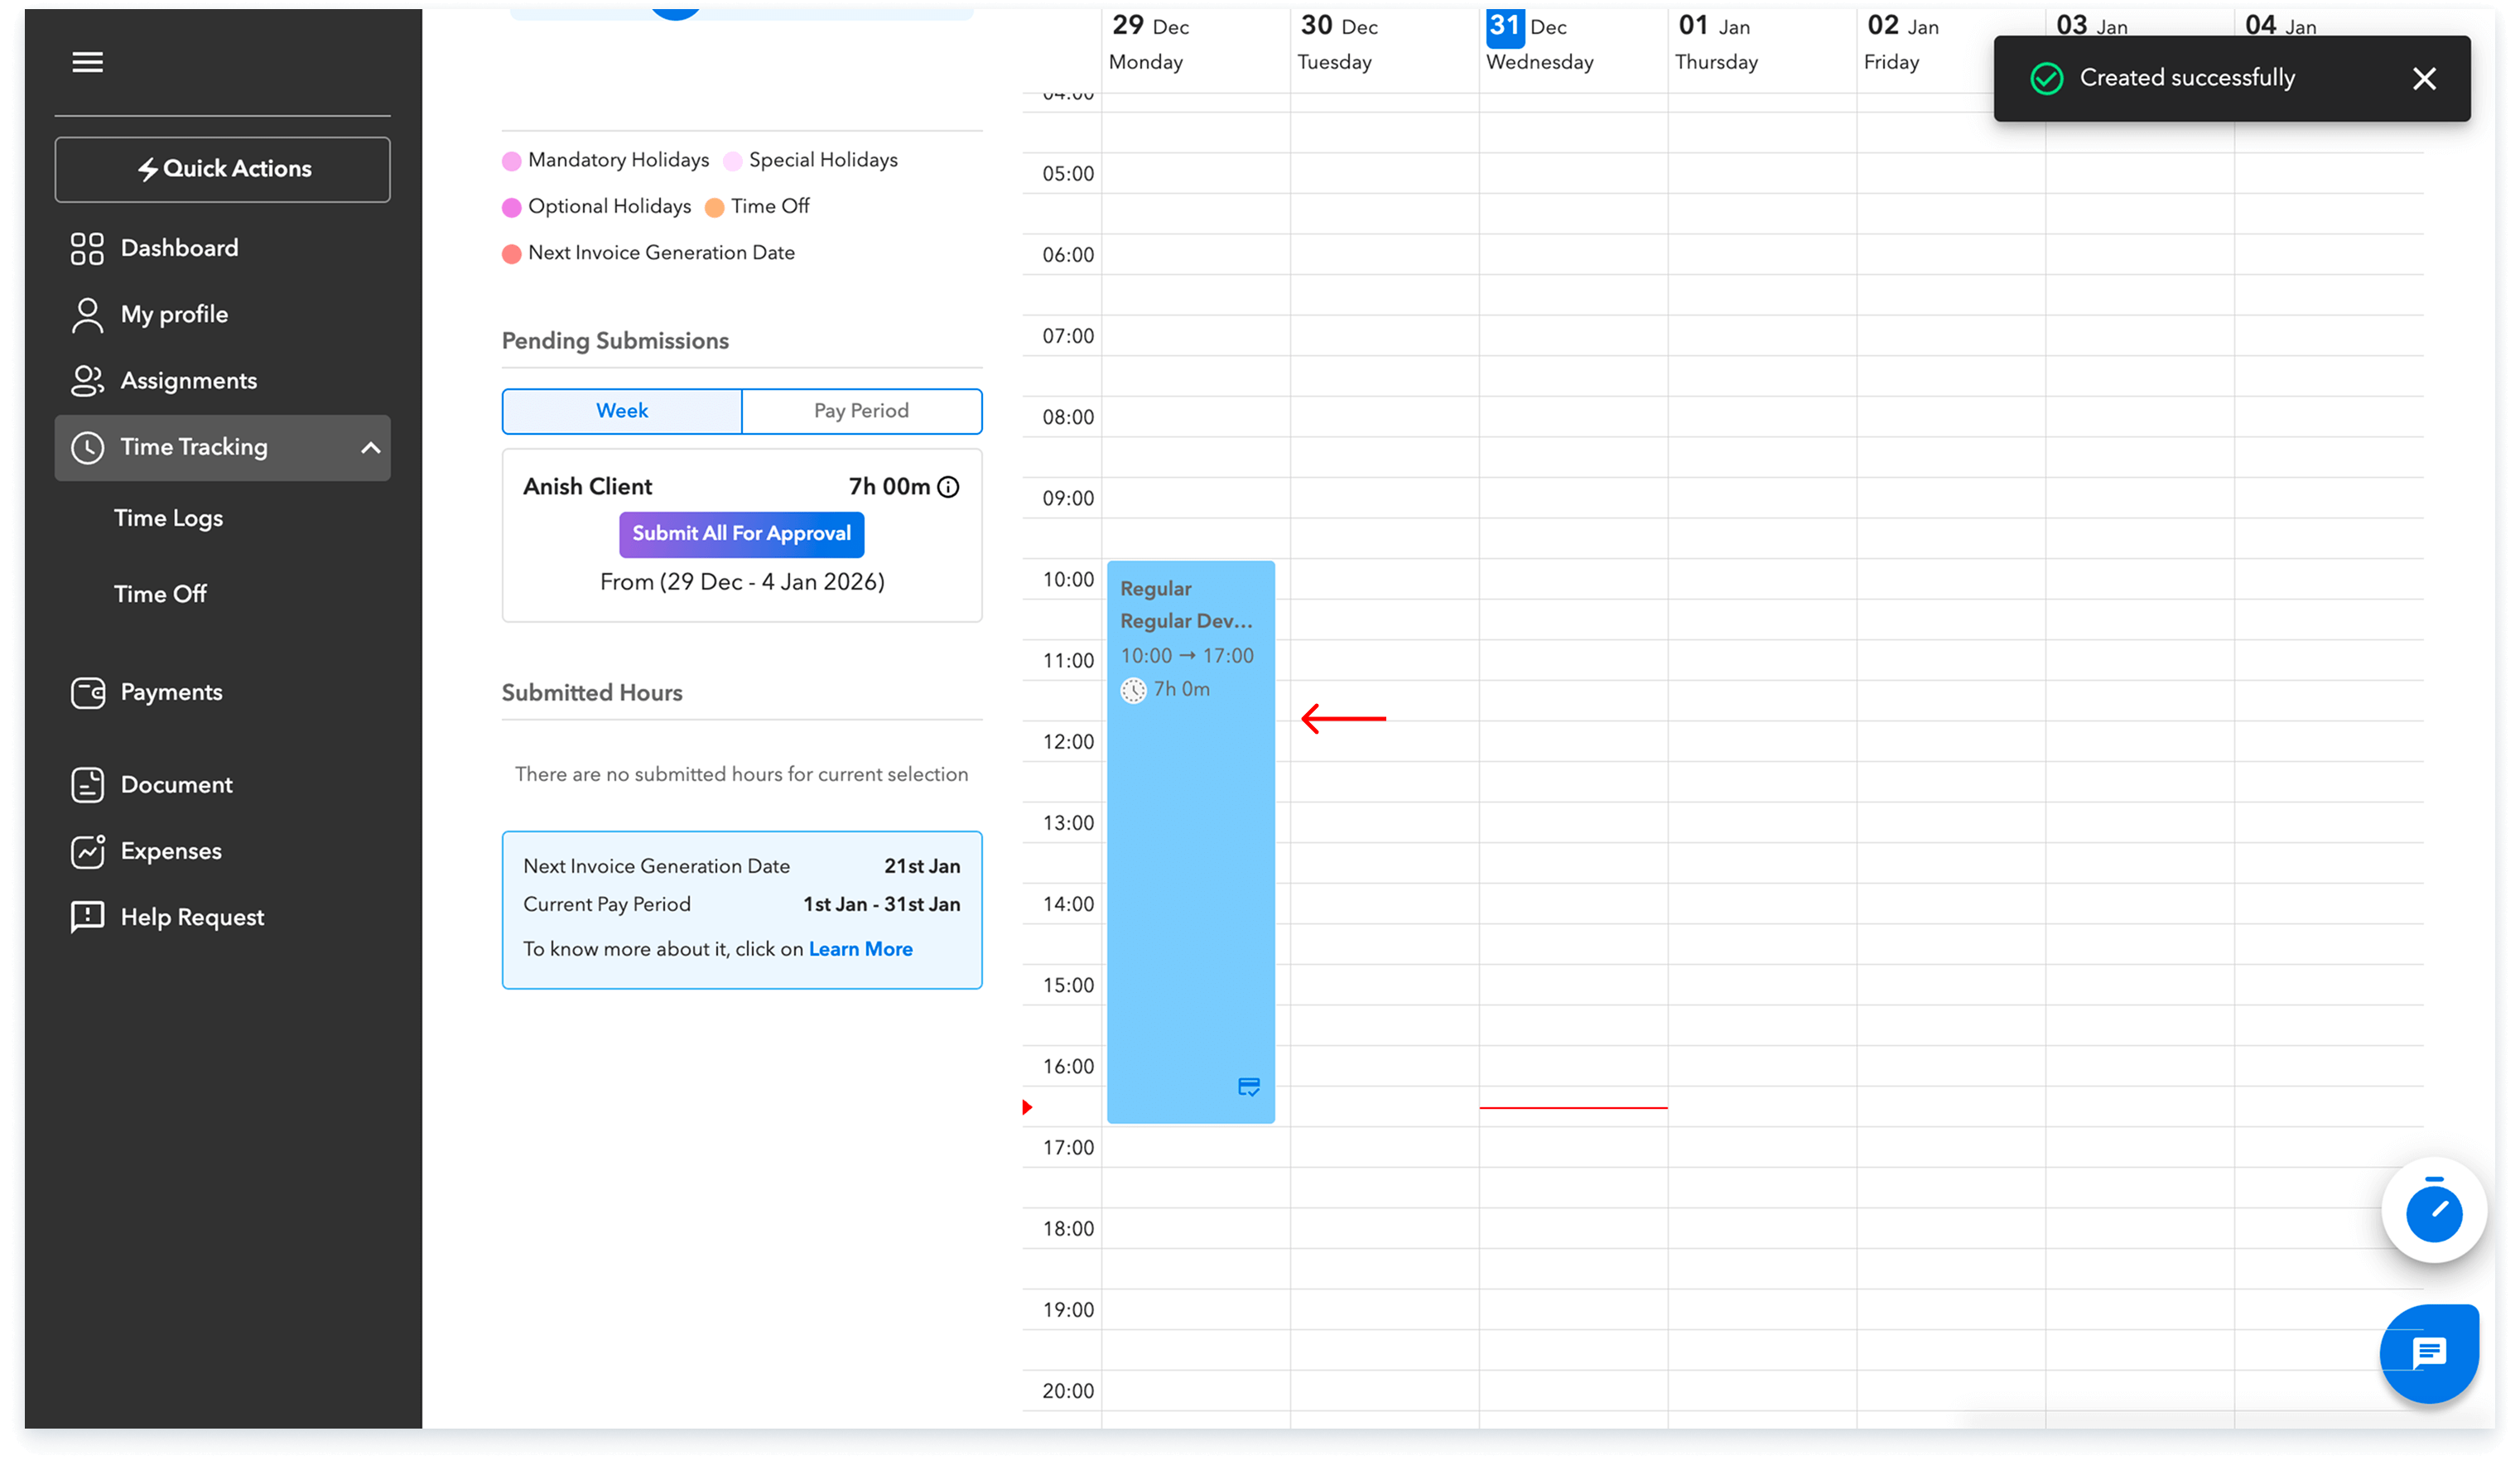
- Your filled time log would now appear on your screen.
Step-3
To submit the time log, click on the time period saved on your calendar and then click on submit for approval.
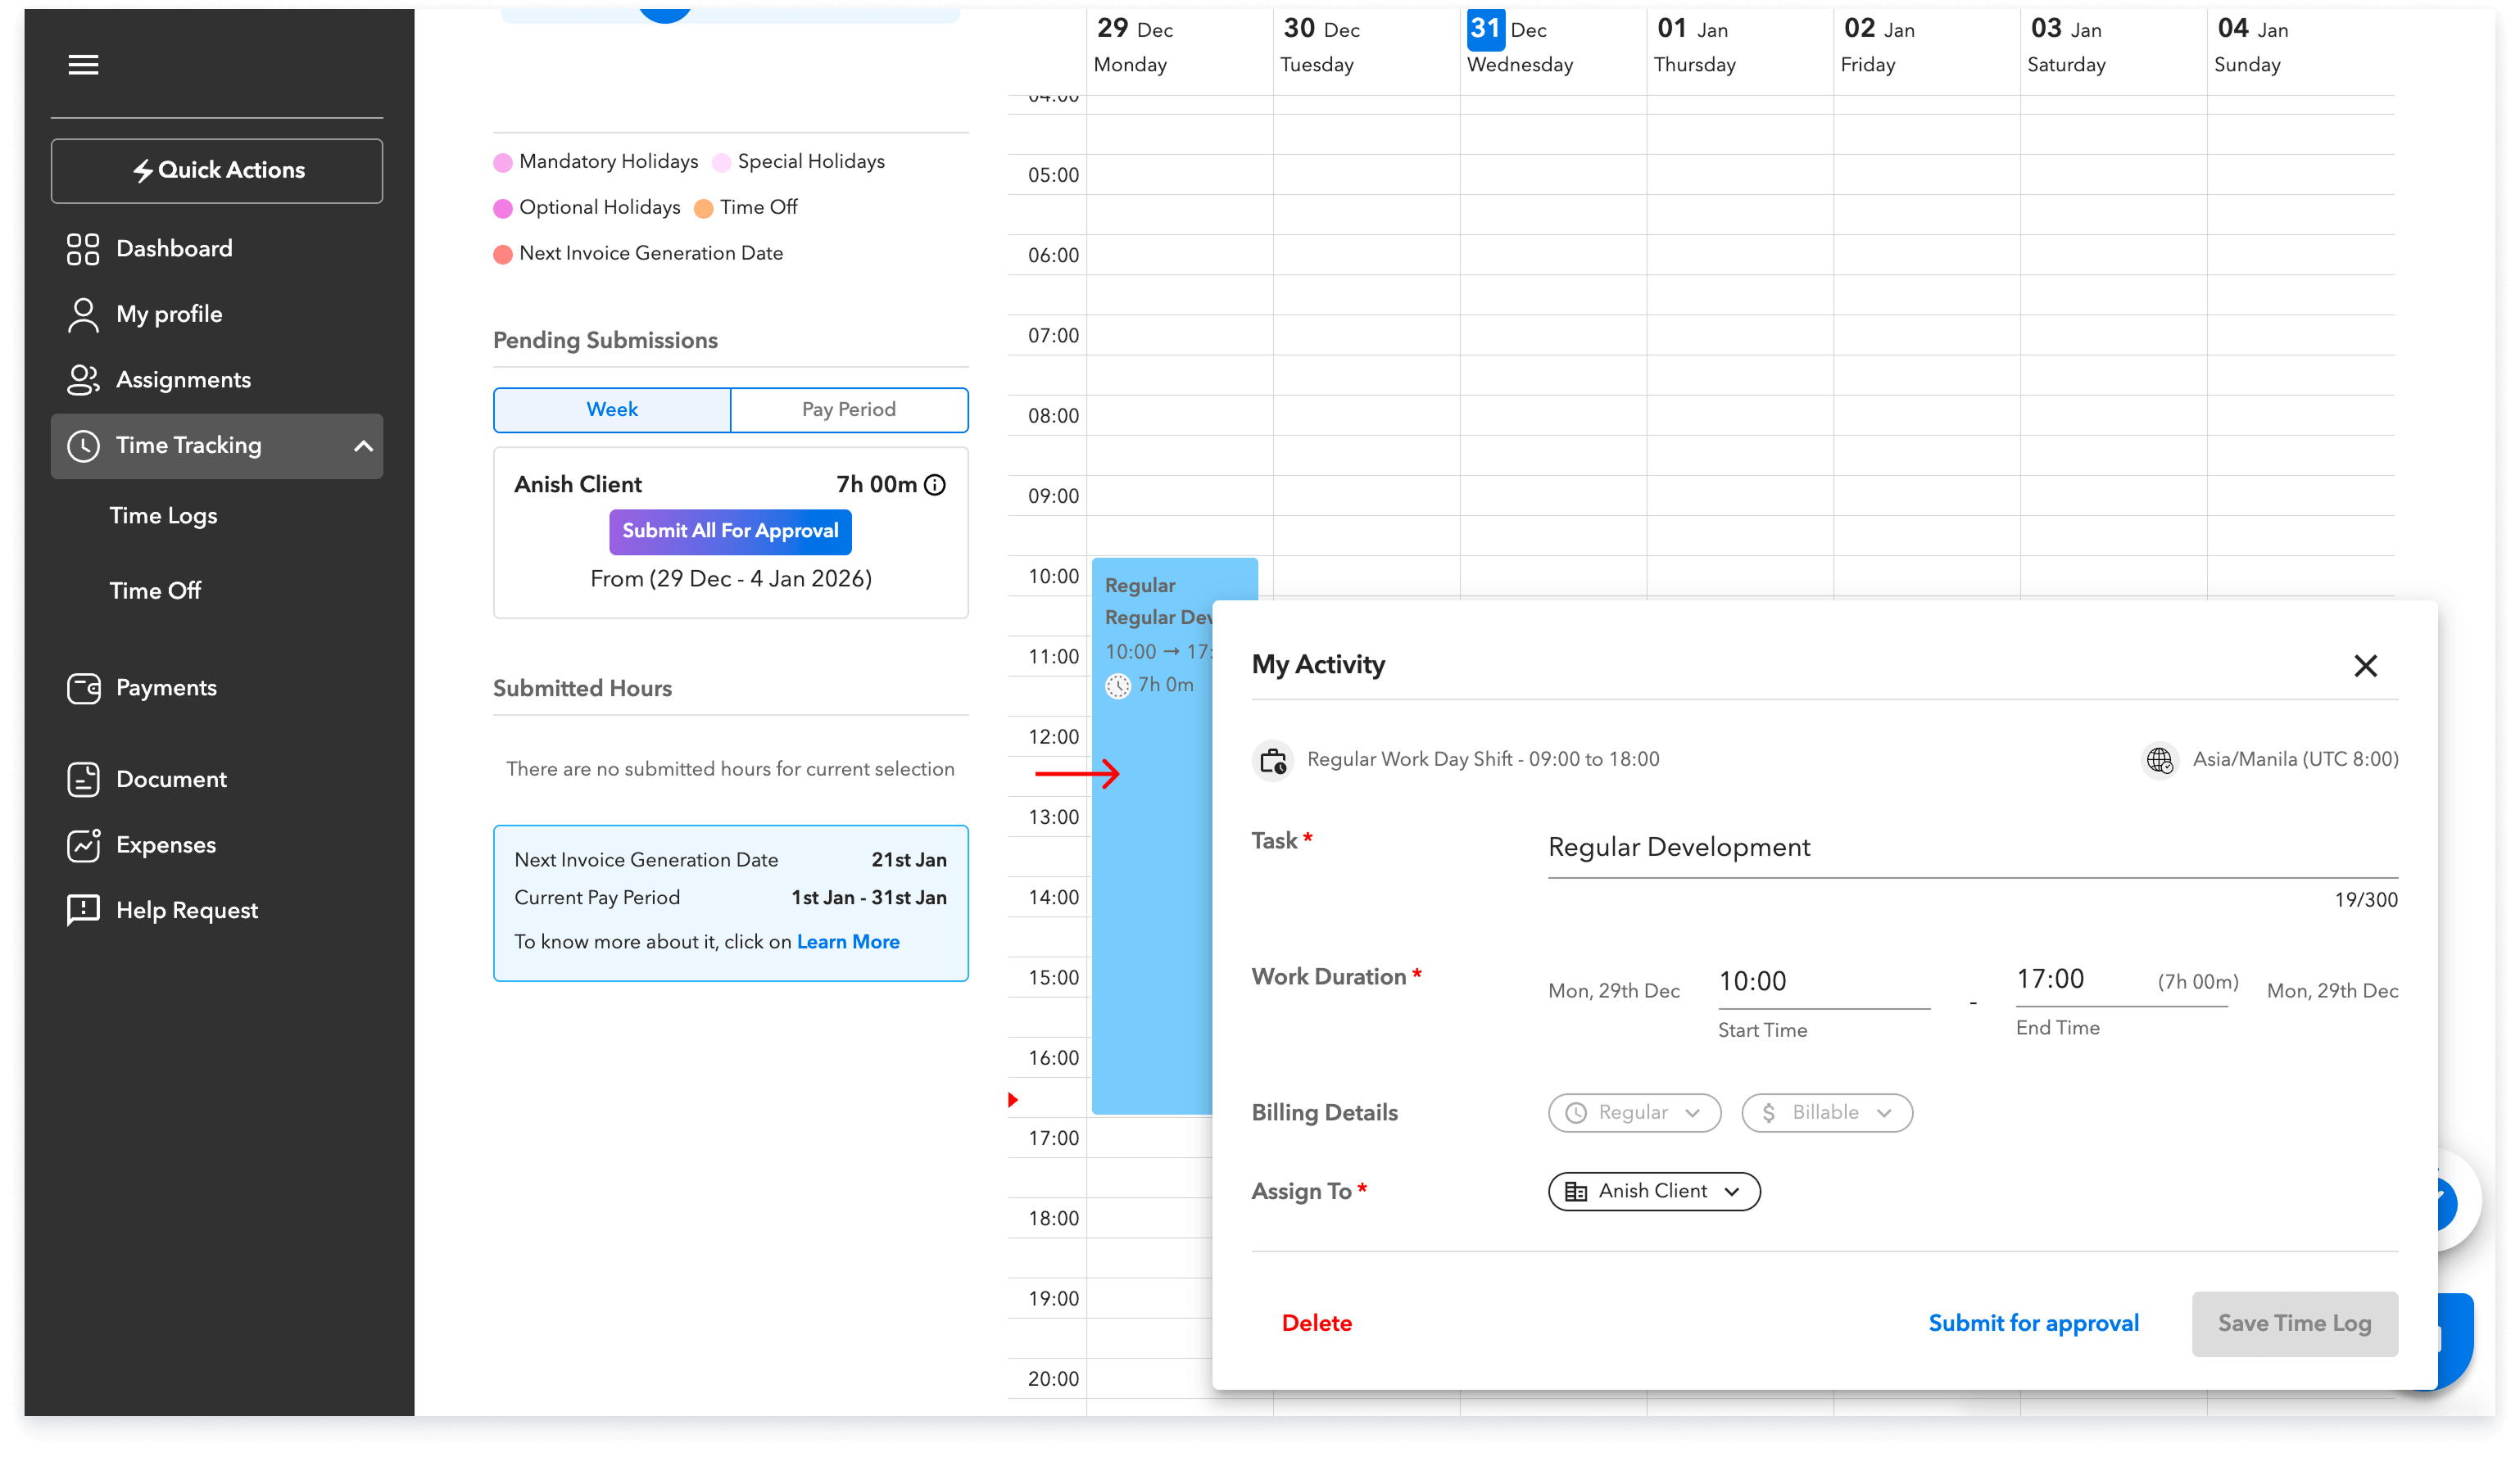
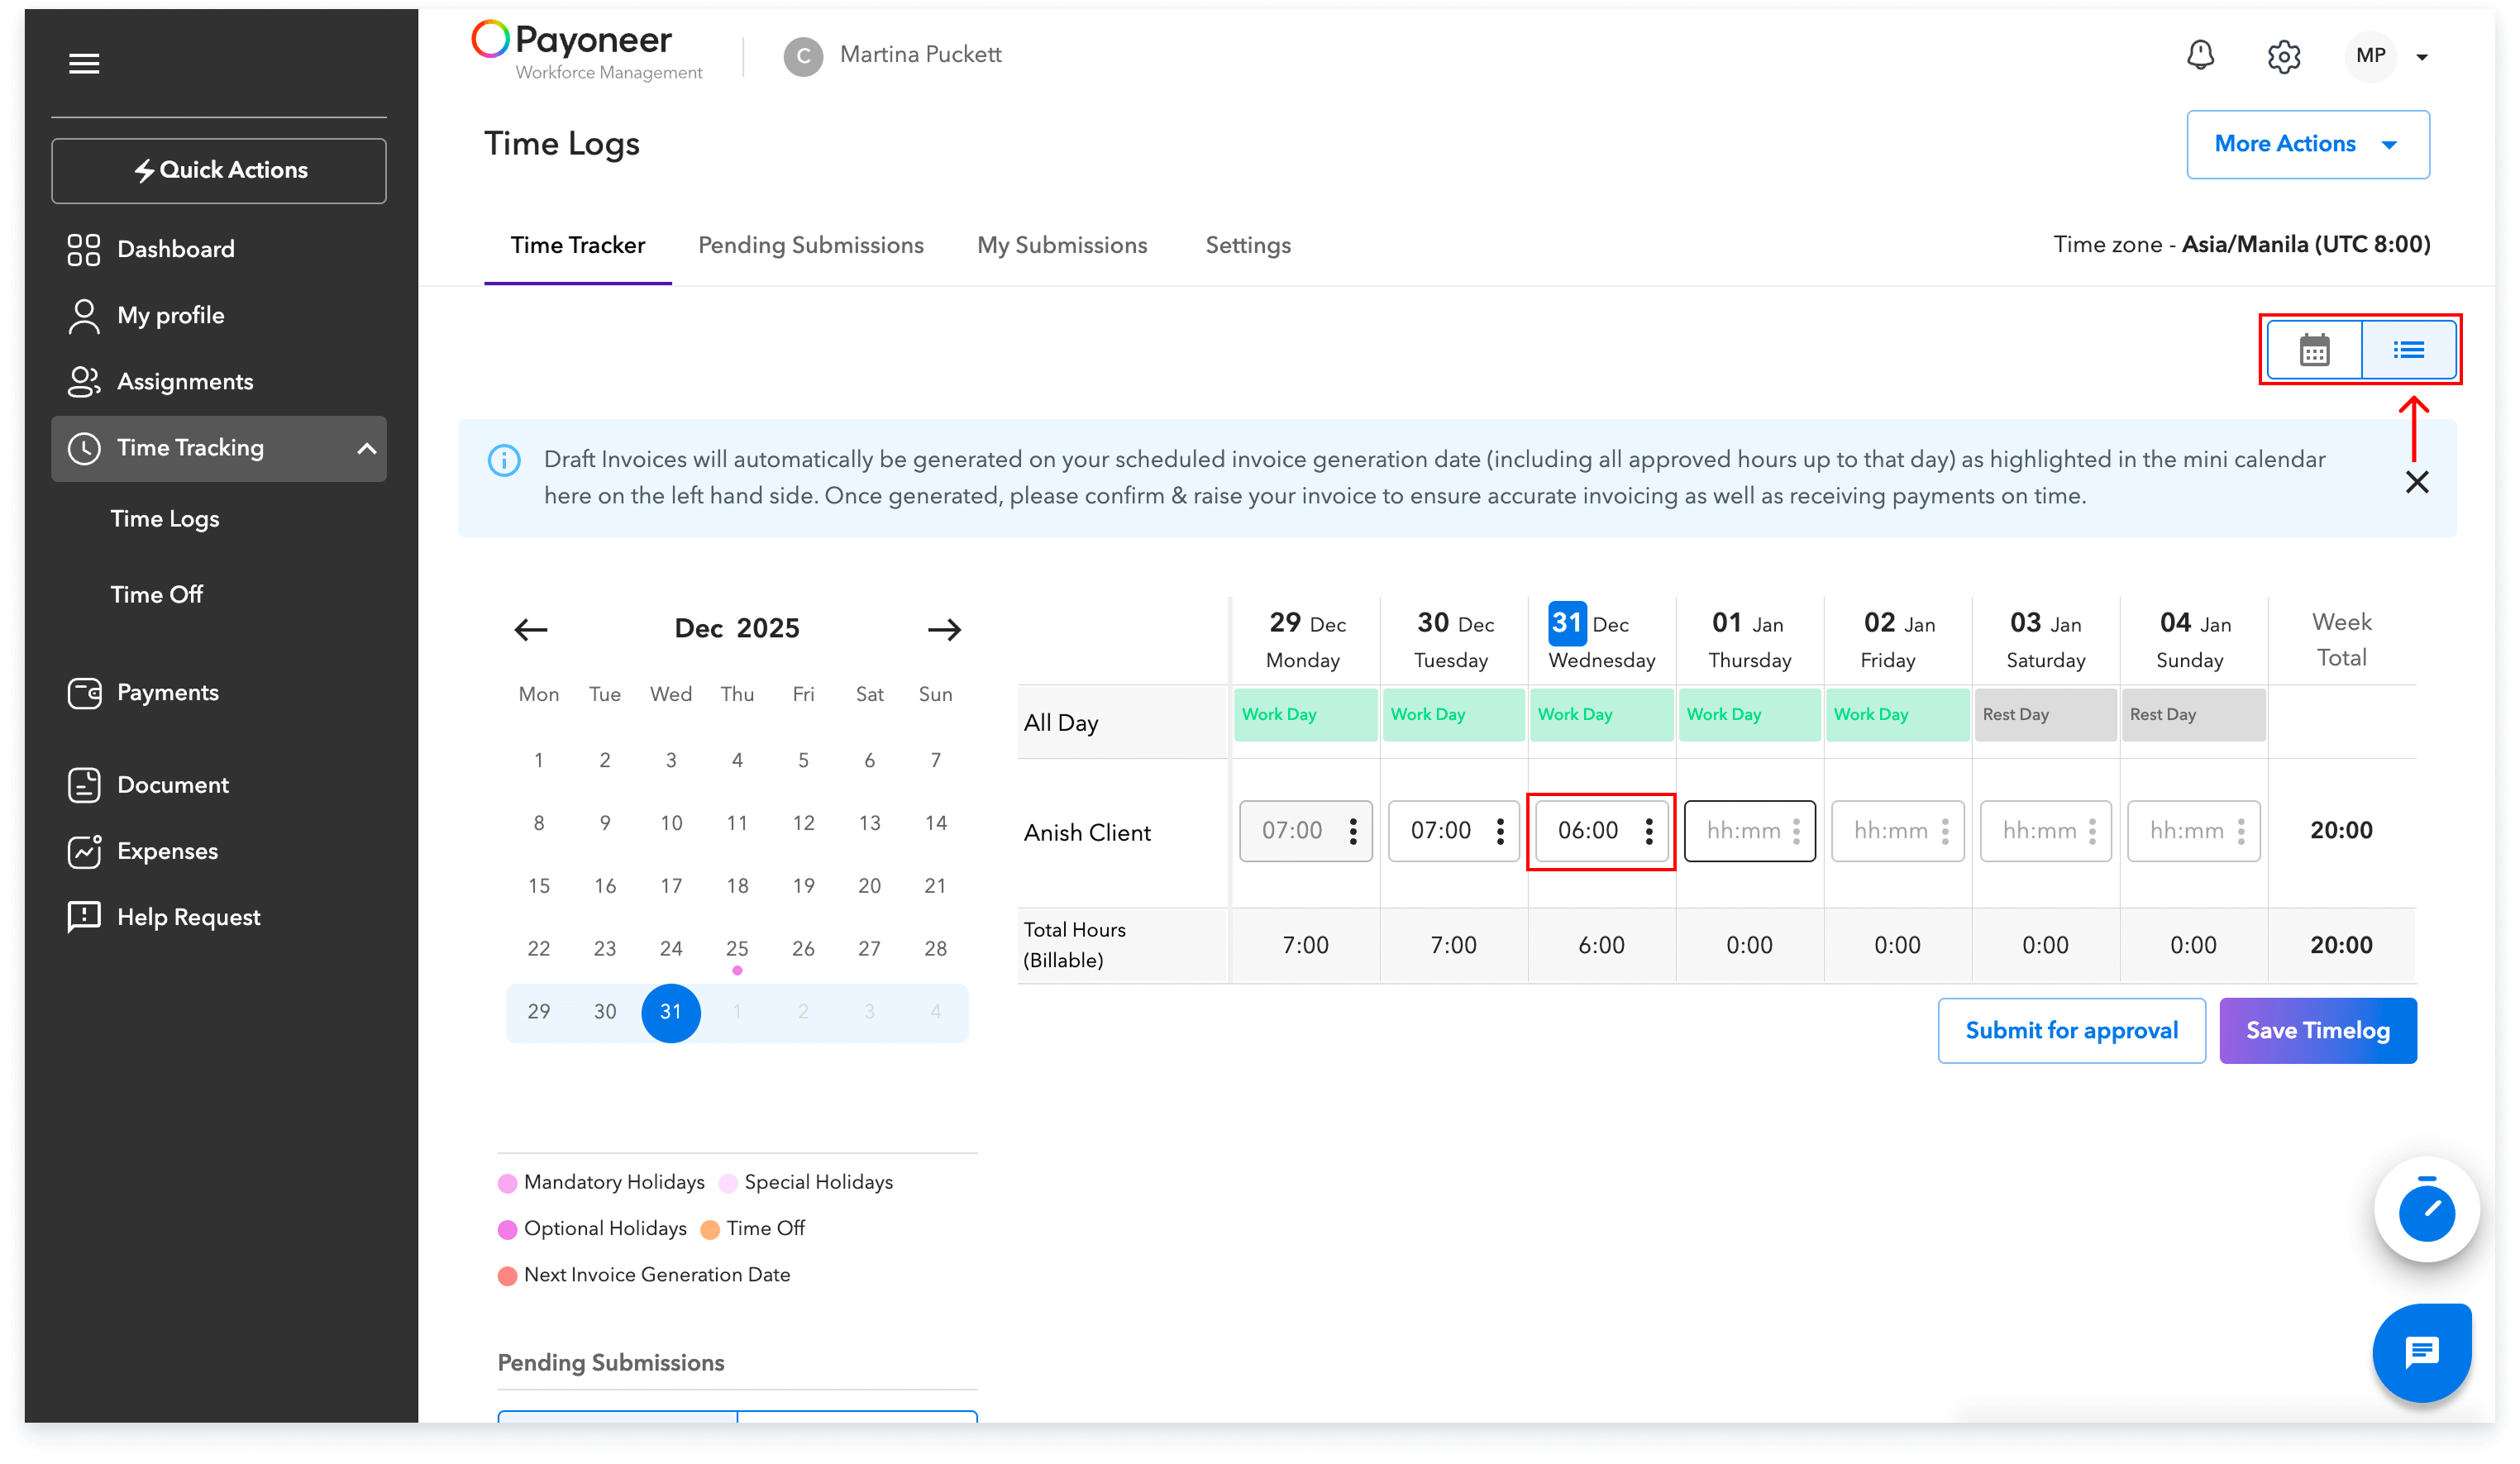
You can also submit the time logs on an hourly basis. Simply switch to the hourly view from the top right of the calendar and enter the daily worked hours under the date as desired and click on save
